

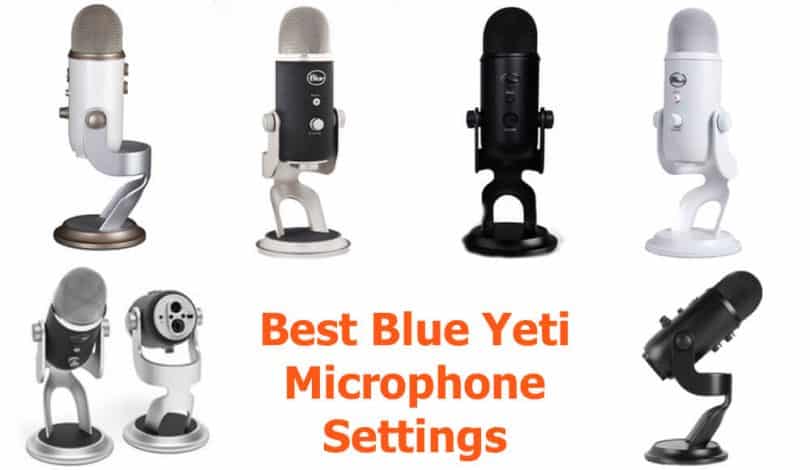
How To Properly Set Up A Blue Yeti Microphone
(Last Updated On: April seven, 2022)
Bluish Yeti microphone comes with various settings, and Information technology has iv pickup pattern options. My ignorance surely prompted me to research more on microphone settings, and I am sharing what I accept learned in this post.
Understanding Blue Yeti Microphone Settings
Yeti is one of those plug 'northward play mics with PC systems and MAC. It is uniform with Mac Bone X, Windows 8, Windows 7, Windows Vista, XP Home Edition, and XP Professional. Moreover, you can direct connect the Yeti microphone to your PC using a USB cable and utilise it correct away. Yet, to understand the Bluish Yeti Microphone further, you need to be mindful of the following different components of Blue Yeti.
Mic Configuration of Blue Yeti
The Blue Yeti mic belongs to the condenser blazon of microphones. Condenser microphones, of course, are super sensitive. Hence, the Blue Yeti is one of those supersensitive mics. If you don't accommodate its setting right, yous may finish up picking up everything similar background racket. As well, it tin choice upwards any tick and flick from the adjacent room. Nevertheless, you can fix it up in such a way that it volition just pick up the audio sources based on your configuration.
Adjusting Proceeds
The Blue Yeti comes with a Gain pick. Proceeds is the allowable level of sound input to the mic. It is like to what the volume does to a speaker. It too refers to the level of sensitivity y'all would similar the mic to take. If y'all simply want to record your phonation, yous can turn the gain down for meliorate vocal recording.
Every bit yous inspect the Blueish Yeti microphone's different controls, you would meet the fundamental knob on the microphone's backside, which you can apply to adjust the gain. You should heart information technology earlier starting, and the indicator should have a vertical position if yous have centered the gain.
You can plow the gain down if you hear some static sound or noise until the audio signals get clear. On the other paw, if the sound is not sounding crisp, then you can increment the gain.
Hardware
The primary thing y'all need to check with your Blue Yeti mic is the hardware. Of course, later unboxing the mic, you can plug it onto your computer using the micro USB cable. Yet, before starting your recording, it will help if you lot familiarize yourself with the hardware.
Every bit you tape, you should not point the microphone's height directly towards you, but like what you would usually exercise with the ordinary mic. Instead, you should position the top like a rocket ship, facing vertically, since this type of mic is a side-address mic.
The Blueish Yeti comes with two adjuster knobs on the microphone stand's side to permit you fold information technology inwardly for piece of cake storage and outwardly when recording. You can also encounter a Blue Yeti logo on the front side wherein you volition also see the mute push button. This mute push is in solid red if yous don't mute the audio. Under that mute push, you will see the headphone volume control. This control tones upwards or down the volume output on your headphones.
As mentioned to a higher place, you will see a knob on the backside for adjusting proceeds. But below this knob is another knob for selecting the recording pattern. Moreover, the lesser role of the microphone has a 3.5mm sound jack together with a USB port.
Recording Patterns

Microphones come with unlike pickup or recording patterns. The Blue Yeti, for case, comes with four pickup pattern options. Here is a brusque discussion of each of these four recording patterns:
The stereo manner: provides a realistic sound epitome. In this pickup pattern, the correct and left channels are active. The mic volition only selection up the sound on the left and right while the sounds from the forepart or behind do not overpower. If you desire clean audio with subtle highs such as guitar solo, then y'all should go for this pattern.
The cardioid fashion: makes utilize of a front-facing mic for directly recording the front sound. This blueprint is similar the shape of the heart; hence, information technology is referred to as cardioid. With this pattern, the mic does not strongly pick up sounds from the back and sides. If you lot are engaged in commentary or monologues, then this is the best pickup pattern to use.
Omnidirectional mode: allows the mic to choice up sounds from all angles in an equal amount. If you want a alive recording with all the ambient audio recorded, you can opt for this pickup pattern.
Bidirectional mode: is perfect if y'all are engaged in an interview. With this setup, the front-facing microphone with the logo and the one behind it capture sound while the two sides cannot pick up sounds.
How to Prepare Upwards Blue Yeti on Different Operating Systems?
Your PC may come with any OS. So, to assistance you gear up your Blueish Yeti mic on your PC, y'all can check out the following procedures on how to ready up this mic on any operating system:
1) Macintosh Setup
To ready your Blue Yeti on Macintosh Os, yous can connect the Yeti mic using the USB cablevision that comes with it. Then, click the Apple card . Afterward, click on the System Preference and select Audio . Click on the Output tab , and then choose Yeti Stereo Microphone nether Select a Device for sound output . And then, click on the Input tab . Afterward, select Yeti Microphone under the Select a Device for Sound Input . Then, you're proficient to become.
ii) Windows 8.ane Setup
If you're using Windows viii.1, you tin can connect the Yeti using its USB cable. You can then movement the mouse toward the lower correct side of your PC screen to open up the Windows 8.1 Charms Bar menu . Then, click Settings , and select Control Console . Later on, click on Hardware and Audio . And then, click on Sounds . After, click on the Playback tab and select the Yeti Stereo Microphone . So, click the Set Default button . Select the Recording tab afterward and choose Yeti Stereo Microphone . And so, click on the Fix Default Button and press OK . So, you are good to go.
3) Windows 7 Setup
On the other mitt, if your Bone is Windows vii, yous can connect the Yeti Microphone using the USB cable. And so, nether the Start Bill of fare , open up the Control Console . Later that, select Hardware and Sound . Then, select Sound . After, choose the Playback tab and select Yeti Stereo Microphone . Then, click on the Set Default button and select the Recording tab . After that, choose the Yeti Stereo Microphone , and and so click on the Set Default push . And then, press OK .
Blue Yeti Settings for Podcasting
If y'all want to practise podcasting, the Blue Yeti will surely come in handy. A podcast is a special video or sound recording that you can release in installment, and you would need a overnice cardioid mic for this recording. So, if yous accept a Bluish Yeti mic, yous should set information technology upward on the cardioid recording mode.
The cardioid polar design is perfect for podcasting because information technology lets you speak in front of the microphone without picking up the sounds at the back. Moreover, this is the most recommended and the but pickup design you lot would use as a podcaster.
And then, set the mic's distance from you. You can figure out the right distance past moving away or toward the mic. With trial-and-mistake, you tin can figure out the sugariness spot wherein yous would sound all-time.
Since the Blue Yeti is in front end of you lot with its tip facing upwards, you don't need to talk on the top of the mic. Then subsequently, you can adjust the proceeds using the rear knob. By adjusting it, you lot likewise alter the overall book of the recording. If you adjust the gain well, you don't need to raise your phonation to get recorded well. Thus, information technology will aid if you prepare the gain at the proper level.
One time yous've set upwards everything, you can plug in your headphones. The headphone port is at the mic'due south bottom. You can hear your voice while you practice the recording and figure out if your vocalism'southward volume and rendition are satisfactory. Moreover, using your headphones, you can check for whatsoever interference or background dissonance. Practice a test recording, and if it is good, then you can start your podcasting.
Setting Upwardly the Yeti for Recording Instruments
The Blueish Yeti is perfect for recording instruments. At the onset, y'all should ensure that the logo faces your instrument. Since this mic records from the side, you should refrain from pointing information technology directly to your sound source.
So, turn downwards the proceeds to ensure that the audio does non reach its pinnacle. Afterward, prepare the mic's pattern to Cardioid. The cardioid mode, of grade, is the ideal polar blueprint when recording instruments. Y'all can as well experiment with the stereo way.
Setting up for Alive Streaming
When alive streaming, you should e'er become for the cardioid mode. Of course, the cardioid polar pattern can help you capture vocalism while doing away with ambient sounds and electric interference. Monitors and other gadgets produce a certain buzz that yous practice not want your mic to capture. So, if you set information technology upwardly on cardioid style, yous can practice abroad with this fizz.
For optimum audio quality, you should position the Blue Yeti on a sturdy desk. It volition help if you fix it around 6 to 12 inches away from you. Maintain this position when recording, and don't lean dorsum or sit back. If you bend forward or backward, y'all should accommodate the mic. The head of the mic should be facing up.
When streaming, you want to set up the proceeds down considering more gain means more audio assimilation. It may aid too if you lot turn the gain downwards to its absolute minimum.
You should as well check the Windows volume because the Windows' volume volition affect the overall volume of the Blue Yeti when streaming. Y'all can set the Windows volume to 100 when you gear up the proceeds down. With this setup, your mic will regain extra sensitivity without picking upwardly noises or actress buzz.
In example this setup wouldn't piece of work well, you can then set the gain to the center point and lower the Windows volume downwardly to 0. Some streamers say that they achieve perfect streaming volume and sensitivity when they use this setup.
Don't be trigger happy in adjusting the Blue Yeti's gain setting. Take it slow to find the sweet spot. It would be all-time to keep the mic as shut to your mouth as possible when speaking. Moreover, y'all should achieve a perfect audio quality that deadens the background noise and lets your vocalisation ring loud and articulate.
Conclusion
The nice matter about the Blue Yeti, bated from being a height-selling microphone, is that y'all tin can easily gear up it up on your desk without so much fuss. You just demand to utilize its USB cable to connect it to your figurer, and you're good to get.
The Blue Yeti mic is as well known for its durability and sturdiness. It too offers a sound characterized by naturalness and well-roundedness. Moreover, it is perfect for podcasting, streaming, or doing voice overs.
The abovementioned tips on setting the Blue Yeti will facilitate the setting up process for you. Besides, after reading this postal service, you volition indeed not repeat the same fault I fabricated with my first Blueish Yeti Microphone. Instead, you will set your Blue Yeti up like an adept and enjoy podcasting, recording, and streaming.

James Mann is a 36-year-old session singer and vocal motorcoach who loves to share his singing and musical experiences online. As well focusing on singing. Songwriting, music production, studio setups and vocal recording and mastering other musical instruments are his passion too.

How To Properly Set Up A Blue Yeti Microphone,
Source: https://www.becomesingers.com/vocal-recording/settings-for-blue-yeti-mic
Posted by: torresthislumakin.blogspot.com
0 Response to "How To Properly Set Up A Blue Yeti Microphone"
Post a Comment